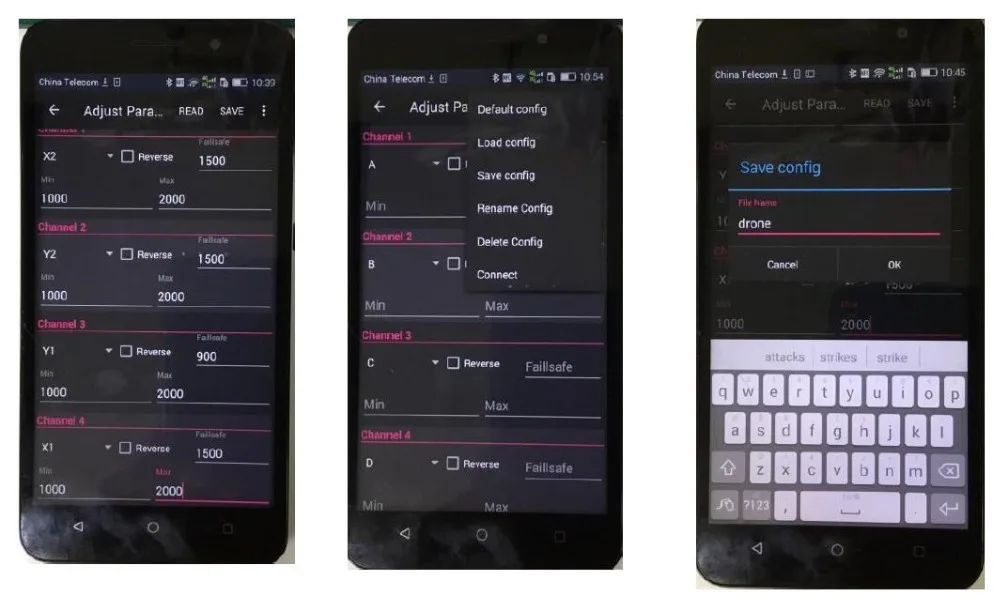
1.6 Flight parameter can be adjusted through App in your phone. It can be linked by either USB (with OTG) or Bluetooth. You can change any features over the App, mode (mode 1, 2, 3,4) , Nor/Rev, failsafe,Sbus, ppm output and baudrate. Data is saved so that you can use anytime.
1.7 Base on “Tower” App to make groundstation perfectly matched each other, larger view on the map. So you may do point to point planning and self operation. Also one key home return.
low power consumption . Your phone can be charged through the micro USB port.
1.9 Highly integrated data, video and flight controller board. It makes the size smaller. Aluminium foldable mounting plate. With 360 degree adjustment.
1.10 The camera equipped with a 8w super bright LED for better capture image at night time
B)
T12 FUAV is specially designed for agriculture, video capture, and drone flying
C) Specification of T12
D. Prepare the first start up
1. Make sure the groundstation (Tx)is fully charged
2. Please check the position of antenna is correctly placed
3. Check the firmware is update
2. How to set parameter through the Apk
2.1 Check battery is fully charged and both reciever(Rx) and groundstation(Tx) are
2.2 Only support Android system at the moment
2.3 Please install APK through official website (www.fuav.xin) Download “Device Helper”
2.4 Turn on the Tx by short press once then long press to turn on. Open Bluetooth on Android phone and search T12-xxx pairing code is 1234
2.5 Open your “Device Helper” to adjust the followings:
2.5.1 Adjust Parameter: Nor/Rev, ATV, Channel, failsafe
2.5.2 Hand Settings: Mode 1,2,3,4
2.5.3 Other option : Select output Sbus, PPM and Baud Rate
2.5.4 Update Device: Online firmware update. Use Bluetooth to update Tx, USB for Rx
2.6 adjust parameter of Tx. Apk read the data of the Tx and Rx
For example:
2.6.1 Ch1: X2 has no Rev, Failsafe value is set to be 1500, min travel is 1000, max is 2000
2.6.2 Ch2: Y2 has no Rev, Failsafe value is set to be 1500, min travel is 1000, max is 2000
2.6.3 Ch3: Y1 has no Rev, Failsafe value is set to be 900, min travel is 1000, max is 2000
2.6.4 Ch4: X1 has no Rev, Failsafe value is set to be 1500, min travel is 1000, max is 2000
Simply tick the box or input value.
PAY ATTENTION:
If failsafe value is “0” (default 1500)
Please select “Save” to keep your data on upper right corner
2.7
Please save the data and rename the model.
3. Reciever
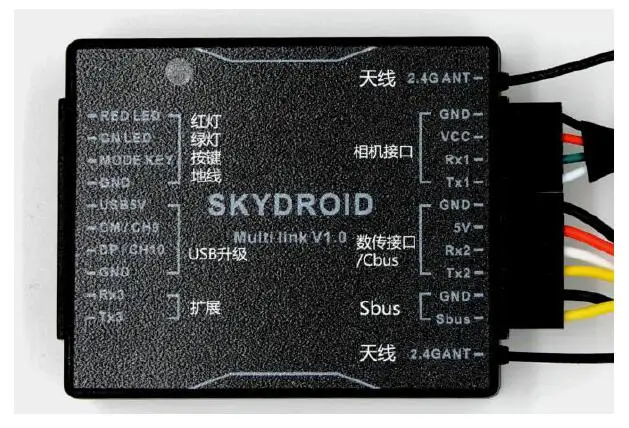
3.1 Short MODE KEY and GND to pair with the Tx, Green LED flash rapidly then turn on the Tx. Solid Green LED light on when pair successfully.
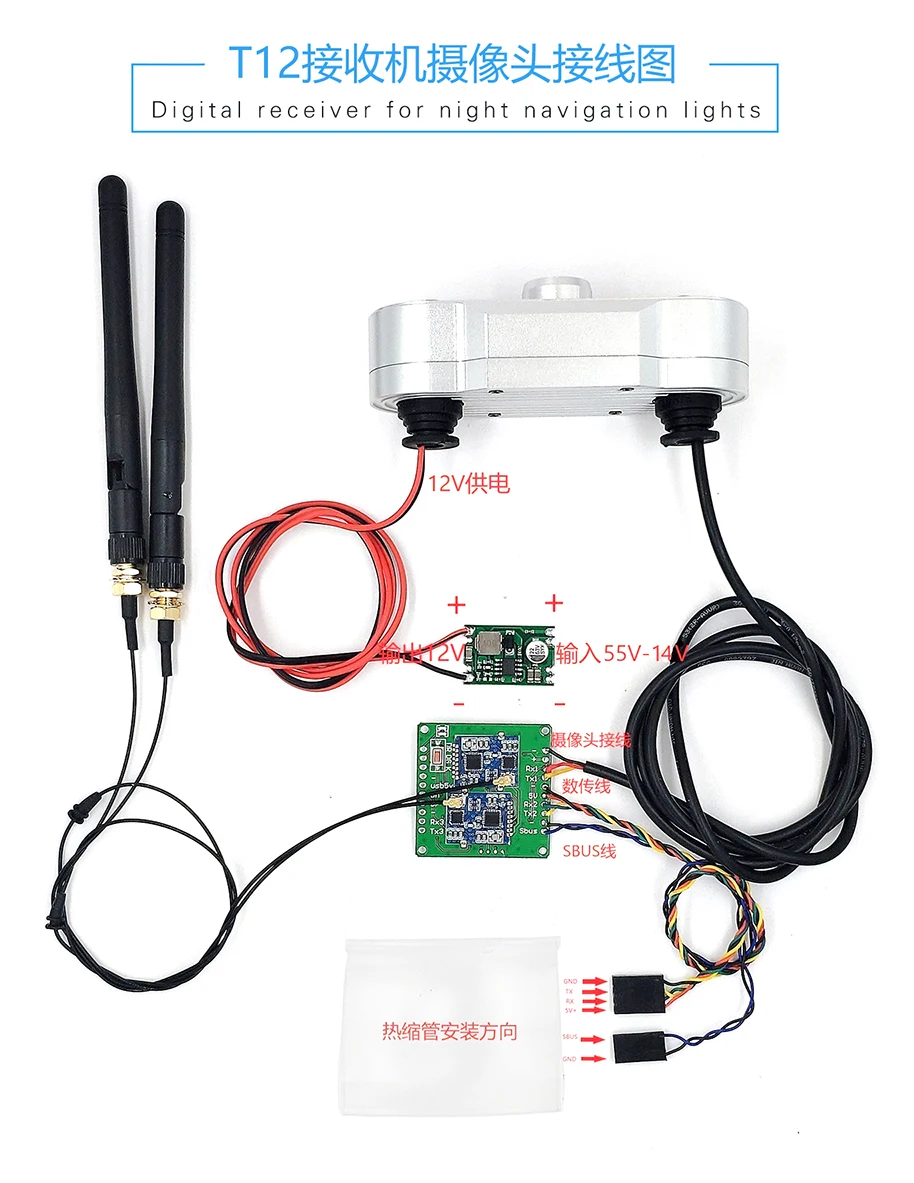
3.2 Pin configuration as shown. Please connect it with your need. Tx pin on Receiver connect to flight controller board Rx.
3.4 USB pins are used for firmware update. Short MODE KEY and GND pins then connect four pins (USB5V, DM/CH9, DP/CH10, GND) to PC(window). Red LED on Receiver flash slowly enter download mode.
3.5 Failure LED indication
Red LED flash rapidly: receiver self detect fail, Sent it back to factory if retry fail.
Red/Green LED flash alternately: receiver self detect succeed
Green LED off but self detect is successful: turn on Tx and pair again
No LED on: Check working voltage is 5v and polarity is correctly connected. Sent back to factory if retry failed.
4) T12 connect to Android phone
4.1 correctly connect receiver and camera. Power on
4.2 install FUAV APK
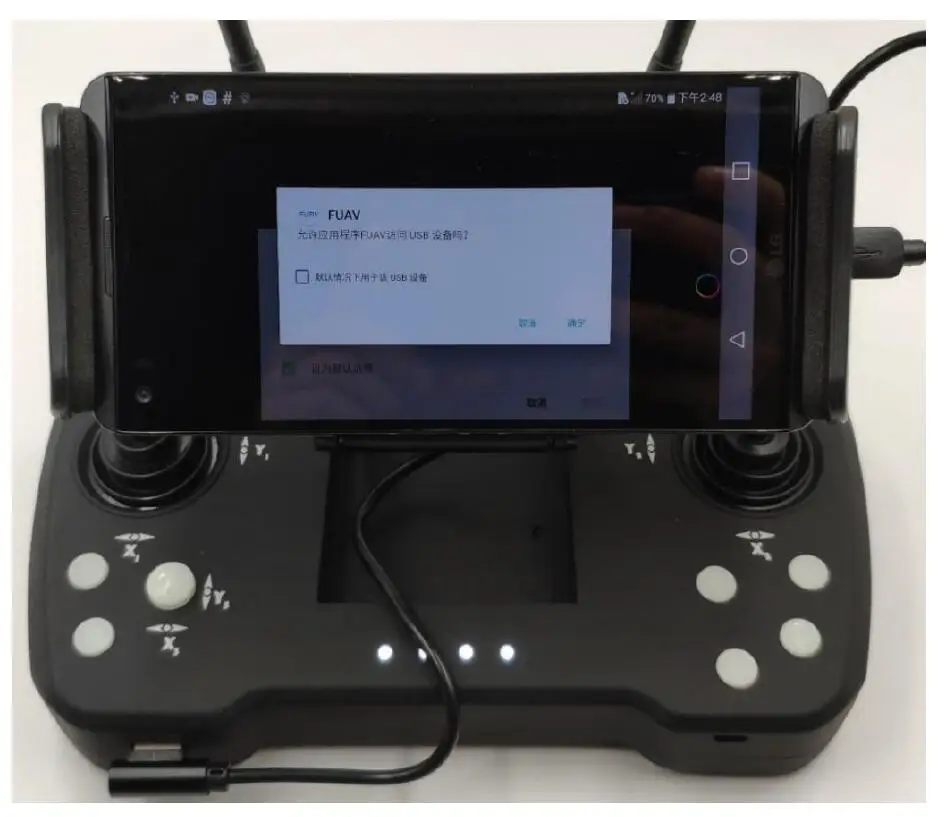
4.3 Use USB cable come with the kit to link up the Tx and Android phone as shown
4.4 Click “Yes” , image will be shown on your phone
5) How to update firmware
5.1 Android upgrade
5.1.1 Open “Device Helper” and link up with Bluetooth. Press the button “A” while turn on the Tx. 5.1.2 Button “A” LED flashing slowly to enter download mode. Check if any new firmware update. 5.1.3 Refresh the firmware if any.
5.2 PC Upgrade
5.2.1 Please browse “www.fuav.xin to select download.
5.3 Tx Upgrade
5.3.1 Link up Tx and PC. Press button “A” while turn on the Tx. Button “A” LED flash slowly to enter download mode.
5.3.2 Double click Firmware Upgrade
5.4 Rx Upgrade
5.4.1 Solder USB cable to upgrade port then press S1 link with PC (window), Red LED show up to enter download mode.
5.4.2 Select bin file and click to upgrade, when 100% the upgrade process is finished. Please unplug the receiver.
6) How to change Mode on T12
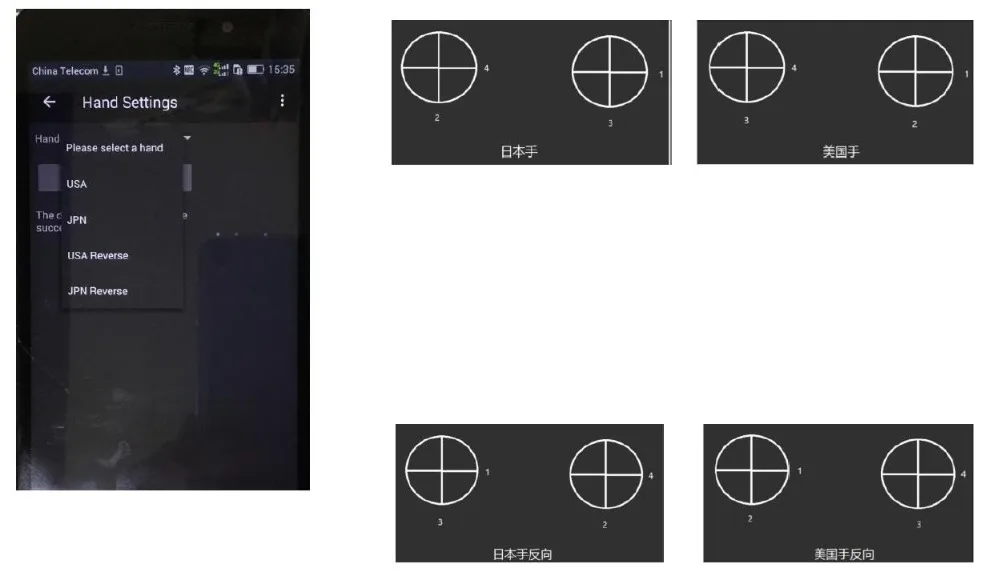
6.0 There are four different mode to be selected, Mode 1(JPN),Mode 2(USA), Mode 3(JPN Reverse), Mode 4(USA Reverse)
7) Frequent Question and Answer
7.1 Q: Does T12 support PPM, Sbus?
A: Yes, The first row pins default as Sbus, Change to PPM signal on the APK.
7.2 Q: How far can T12 reach?
A: Under the clean signal circumstances. Video signal can reach 20km while Data signal
Can be 30km.
7.3 Q: How to define two antenna on T12
A: Dual antenna are 2.4Ghz, also dual module inside for transmission.
7.4 Q: How to define two antenna on the receiver
A: Receiver also use dual antenna, they perform as transceiver. Please place the angle of two antenna as we recommended
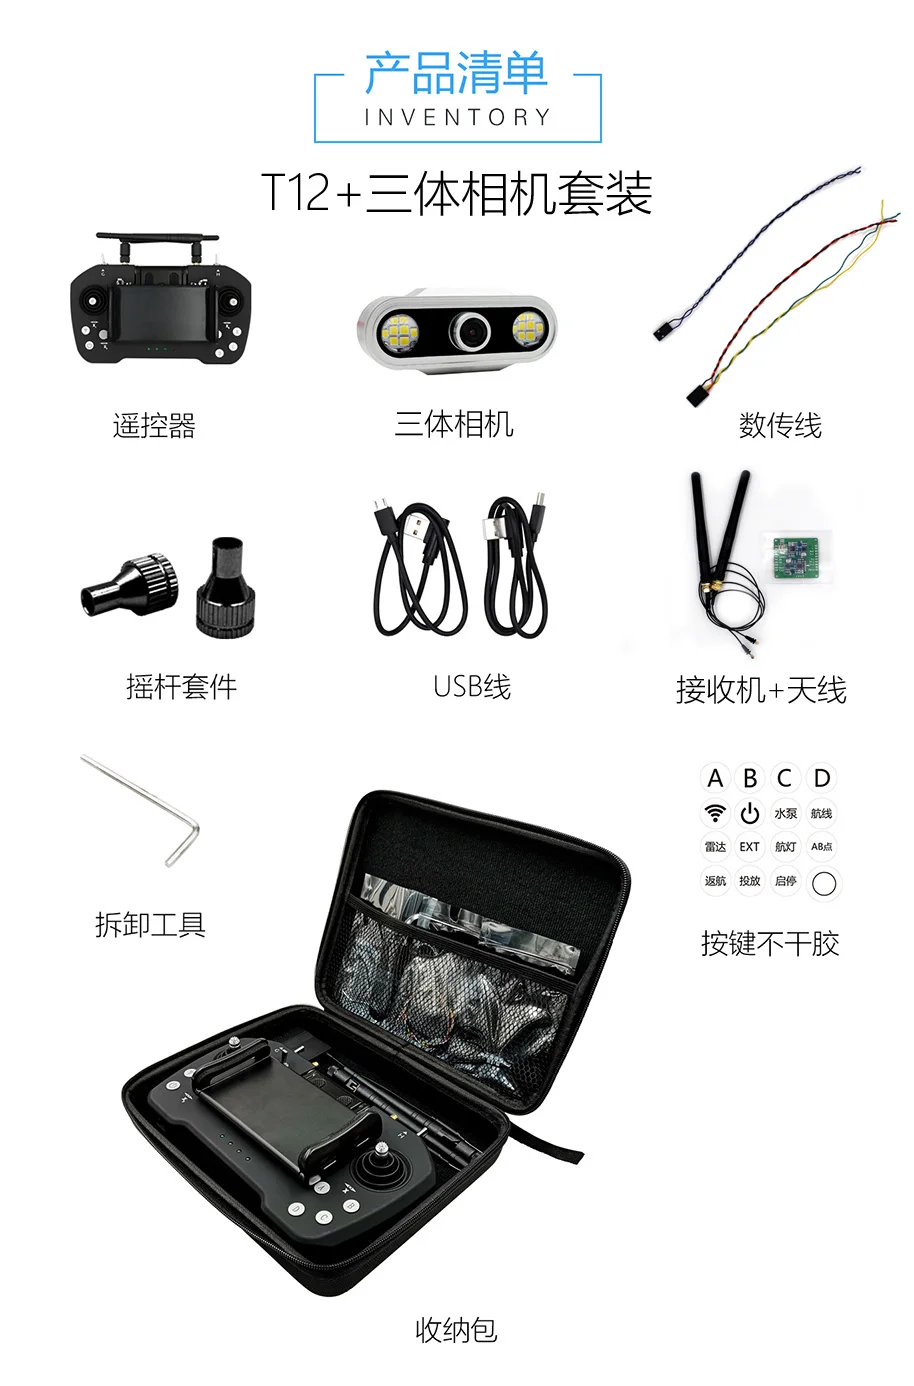
7.5 Q: What inside the T12 package?
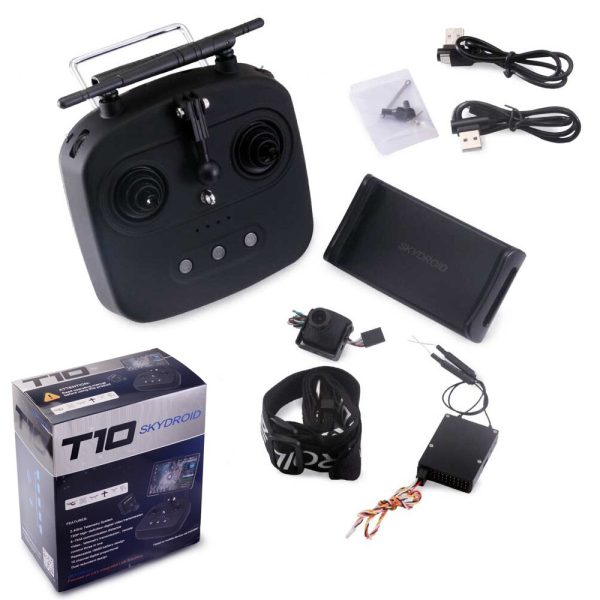
A: T12 Tx one unit, two 2.4G antenna, Data cable, Rx one unit
7.6 Q: How to charge the T12?
A: Use a Micro USB cable to charge the T12. Flashing in charging mode while off in Full charged.
7.7 Q: How to obtain the latest ground station software and updated firmware?
A: Please visit www.fuav.xin to download and learn from the video.
7.8 Q: Failed to link with APK?
A: please check the baudrate, connection with flight control board or Bluetooth is occupied by other device. Our groundstation is well linked with PIX flight controller board. Also the other groundstation Map come with flight controller board.
7.9 Q: How to turn off/On the Tx
A: Short press the power button then long press to turn on the Tx and vice versa
7.10 Q: Fail to unlock the flight controller?
A:
7.11 Q: No LED on receiver when link with the flight controller?
A: Turn on the Tx, if still no signal please check the battery level and pair again
7.12 Q: Change hand Mode
A: Open “Device Helper” to change the hand mode
7.13 Q: Abnormal stick position
A: Calibrate again
7.14 Q: what is the signal transmission space
A: about 400/ms
7.15 Q: Do the T12 pair with new receiver?
A: Yes, T12 sent ID to receiver randomly. It works with the new pair receiver
Outside Dhaka
